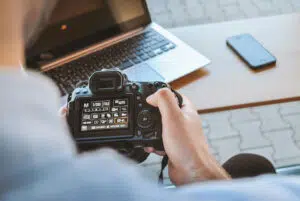
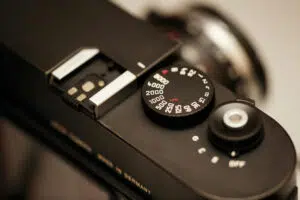
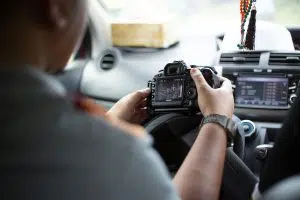
You’ll likely notice a dial with different letters and symbols when picking up a camera. These represent the camera shooting modes, each designed to give varying levels of control over your photos. While Auto mode handles everything for you, Program (P), Aperture Priority (A/Av), Shutter Priority (S/Tv), and Manual (M) offer more flexibility.
Understanding when and how to use these modes can improve your photography skills and help you capture the perfect shot. If you’re a beginner wondering about the best camera shooting modes for beginners, this guide will break down each mode and its benefits.
What Is Auto Mode, and When Should You Use It?
Auto mode allows the camera to make all the exposure decisions, including shutter speed, aperture, ISO, white balance, and focus. It’s ideal for beginners, quick snapshots, or situations where adjusting settings manually isn’t practical. Many photographers start with Auto because it simplifies the process and ensures the camera makes technically correct exposure decisions. In well-lit conditions, Auto mode can produce sharp, well-balanced images without much effort.
The biggest advantage of Auto mode is convenience. You don’t have to worry about exposure settings, which makes it great for fast-moving situations or when you just want to enjoy the moment without thinking about camera controls. However, Auto mode has its drawbacks. The camera’s decisions may not always match your creative intent, and it can struggle in tricky lighting.
Low-light scenes might result in excessive noise due to high ISO choices, and the camera might choose a slow shutter speed, leading to motion blur. Auto mode also removes control over depth of field, which is crucial for creating subject-background separation in portraits or achieving deep focus in landscapes. If you’re interested in camera shooting modes for low-light photography, you’ll likely need more control than Auto mode provides.
What Is Program Mode (P)?
Program mode offers a step up from Auto by allowing some manual adjustments while still selecting shutter speed and aperture automatically. You can control ISO, white balance, and exposure compensation. This mode works well for casual shooting when you want some creative input but still need quick, reliable results. If you’re trying to understand how to use camera shooting modes effectively, Program mode is a great place to start.
The main benefit of Program mode is flexibility. Unlike Auto mode, it allows you to adjust settings without worrying about exposure balance. The camera still selects the best shutter speed and aperture, but you can override these settings with exposure compensation if needed. This makes it a great transition mode for beginners who want to start experimenting with manual controls without fully committing to Manual mode.
The downside of Program mode is that while it offers more control than Auto, it still doesn’t give full creative freedom. The camera is still making exposure decisions, which means you might not always get the exact results you envision. For instance, if you want a shallow depth of field but the camera prioritizes a smaller aperture for a balanced exposure, you’ll have to work around it by adjusting other settings.
When Should You Use Aperture Priority Mode (A/Av)?
Aperture Priority mode (A on Nikon, Av on Canon) lets you choose the aperture while the camera adjusts the shutter speed for correct exposure. This mode is perfect for controlling depth of field. Portrait photographers use Aperture Priority to create beautiful background blur, while landscape photographers rely on it to keep the entire scene in focus. If you’re comparing Manual vs Auto camera shooting modes explained in detail, Aperture Priority strikes a balance between ease of use and creative control.
The main advantage of Aperture Priority mode is control over depth of field. If you want to isolate your subject from the background, selecting a wide aperture (like f/1.8 or f/2.8) achieves that dreamy, blurred effect. Conversely, if you want everything in sharp focus, such as in landscape photography, a narrow aperture (like f/8 or f/16) ensures that both foreground and background elements are in focus. This mode also allows you to prioritize low-light performance by choosing a wide aperture to let in more light.
One limitation of Aperture Priority is that the camera may choose a shutter speed that isn’t ideal. If you’re shooting in dim lighting with a narrow aperture, the camera may select a slow shutter speed, leading to motion blur. To counter this, photographers often increase the ISO or use a tripod. Another downside is that if you’re shooting in rapidly changing lighting conditions, such as moving from shade to bright sunlight, the camera might not adjust the shutter speed quickly enough, leading to overexposed or underexposed shots.
What Is Shutter Priority Mode (S/Tv), and When Is It Useful?
Shutter Priority mode (S on Nikon, Tv on Canon) allows you to select the shutter speed while the camera adjusts the aperture. This mode is useful when capturing movement, whether you’re freezing action or introducing motion blur for artistic effect. Many photographers exploring understanding aperture and shutter priority modes rely on this setting for dynamic shots.
The main advantage of Shutter Priority mode is control over motion. If you’re photographing fast-moving subjects like sports or wildlife, selecting a high shutter speed (like 1/1000s or faster) ensures sharp, freeze-frame results. On the other hand, if you want to create a sense of movement, such as in waterfall photography or light trails, using a slow shutter speed (like 1/10s or slower) produces a smooth, flowing effect.
One drawback of Shutter Priority is that the camera may not always be able to adjust the aperture adequately. If you select a very fast shutter speed in low light, the camera might not be able to open the aperture wide enough to let in sufficient light, leading to underexposed images. Similarly, if you set a very slow shutter speed in bright conditions, the camera may not be able to close the aperture enough to prevent overexposure. In these cases, using ISO adjustments or neutral density filters can help balance exposure.
Why Use Manual Mode (M)?
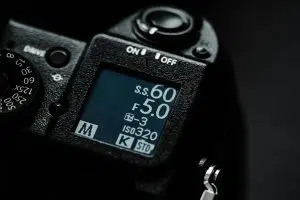
Manual mode gives you full control over aperture, shutter speed, and ISO. This mode is best for photographers who want complete creative freedom and precision. It’s commonly used in studio photography, night photography, and situations where you need absolute control over exposure settings. If you’re looking for camera shooting modes for low-light photography, Manual mode gives you the most flexibility. For a deeper understanding, check out our guide to using Manual Mode.
The biggest advantage of Manual mode is total customization. You can fine-tune settings to match your vision without the camera making any automatic adjustments. This is particularly useful for tricky lighting conditions where Auto or semi-automatic modes might struggle.
The downside of Manual mode is that it requires more knowledge and effort. Beginners may find it overwhelming at first since every setting needs to be adjusted manually. In fast-paced environments, like street photography, adjusting settings on the fly can lead to missed shots.
Final Thoughts
Understanding camera shooting modes helps you take better photos in any situation. Auto mode is great for convenience, while P, A, S, and M provide varying levels of control over exposure and creative choices. If you’ve ever wondered how to use camera shooting modes effectively, the best way to learn is through practice.
Experimenting with these settings will not only improve your photography but also give you the confidence to capture images exactly as you envision them.